
Welcome to Yelling Tree Press embroidery Tips page.
Some embroidery tips are included in each Yelling Tree Press kit guide that comes with each Yelling Tree Press kit. Below is some additional information too, which you may find helpful as you go along.
For step-by-step stitch instructions, please click on our Stitches page.
Below are general embroidery instructions, which we hope you find helpful when working on your Yelling Tree Press embroidery kits.
We hope you enjoy using them. If you have any queries, please email yellingtreepress@gmail.com
General embroidery instructions
Hate reading instructions? No problem. Grab your needle and begin sewing!
Like instructions? Read on …
- General embroidery instructions
- How to minimise tangles with embroidery thread!
- How long to cut your embroidery thread?
- How to divide your stranded cotton for embroidery
- Do I need an embroidery hoop?
- What if I run out of embroidery thread when doing the kit?
- Care for your finished embroidery project
- What’s the easiest embroidery stitch?
- How to work with DMC metallic thread: some tips …
- Tips on solving embroidery ‘mistakes’
- Do you really need to unpick your embroidery?
- How to unpick your embroidery
- Tips to help you place your stitches correctly
- Tips to smooth over embroidery glitches
- Practice tip!
How to minimise tangles with embroidery thread!
These instructions work for DMC embroidery skeins. Other brands may vary.
• Gently pinch the skein by the small paper label at the top of the skein.
• Look for the end of the skein dangling down.
• Gently pull it.
(If your thread is on a bobbin, just cut the length you need).
How long to cut your embroidery thread?
Cut off a length about 45 cm (18 inches).
Rather than measuring, you can hold the end in your fingers and cut a length a little longer than the distance to your elbow.
This will vary from person to person but be a suitable length for you.
Also – some stitches will enable you to use a longer length before the thread shows signs of wear. Larger stitches = longer length, as they pass through the fabric fewer times per length.
How to divide your stranded cotton for embroidery
• Divide the cut length (it is made up of 6 strands), carefully pulling off the number of strands you want in one go.
• If it bunches up, straighten it out. It’s unlikely to be actually knotted.
Do I need an embroidery hoop?
This is personal preference. At Yelling Tree Press, we would recommend that you do use a hoop or frame. The aim of the hoop or frame is to keep your stitching tension even.
You can choose to use one for some areas, but not all (e.g. perhaps use one for those areas with a lot of detail that you’ll be working on for a while, or those that are finer to work). You may like to use one the whole time, which is what we’d recommend.
If you do use a hoop, be sure to loosen or remove it when not sewing, so that your work doesn’t get unnecessarily crushed and the fabric can relax between sewing sessions.
At the end of your project, pressing your embroidery on the reverse will dramatically improve its finish and look, so don’t worry if it looks a little scrunched as time goes by.
You can bind your hoop with fabric, to protect the embroidery fabric.
If using a roller frame, we’d recommend including something to protect your embroidery as you roll (so that work you’ve done doesn’t crush or become crushed). You could use spare fabric you have or tissue paper – you’re looking for something that doesn’t have a strong texture to it, and something that won’t unnecessarily rub your embroidery or leave it fluffy! A few layers of an old sheet and/or a few layers of tissue paper work well.
What if I run out of embroidery thread when doing the kit?
In the Yelling Tree Press embroidery kits, we have provided enough thread for you to have many, many hours of happy stitching.
You will likely need to buy more if you’re going to fill in the background. For the larger kits (such as the Green Comet, Gold Comet or Star Cluster (large pillow kit coming soon) you will need to buy an estimated 15-30 skeins.
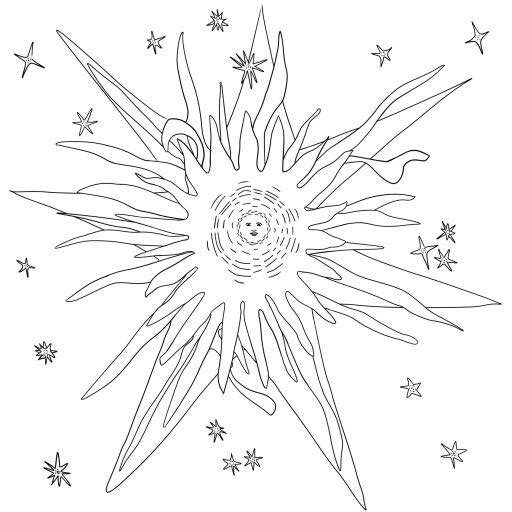
On the other hand, the Sun, Moon and Shimmering Star kits, as shown in the worked examples, were each embroidered using solely the threads that come with each kit.
The DMC numbers for an exact match are listed in your kit.
Note, you can buy cheaper thread. If so, check for colourfastness and ‘ironability’ (sometimes the cheaper thread has non-cotton content so will not press as well).
Care for your finished embroidery project
· Your fabric can be machine in the Yelling Tree Press embroidery kits can be washed on a delicate cycle at 30°.
· We would really recommend hand washing embroidery however in preference.
· In fact, wash your embroidery as little as possible!
· It can be pressed with an iron on a low heat, on the reverse side of your embroidery. You may like to protect it with a layer of fabric between the iron and your embroidery
· DMC thread is washable and ironable (see thread label).
What’s the easiest embroidery stitch?
The stitches in the Yelling Tree Press stitch library are in alphabetical order, not in order of difficulty.
The very easiest stitch to start with is Running stitch, then try Whipped Running stitch, or Laid Work. After that just choose a stitch you like the look of from the Yelling Tree Press stitch library and give it a go.
Running stitch alone can be used in a myriad of different lengths, placed at different angles and distances, to create numerous effects. This makes the Yelling Tree Press kits absolutely suitable for someone (even a child – of course keeping in mind care with sharp needles and scissors) new to embroidery to make their first stitches. Yet an experienced embroiderer can also find huge creativity and versality just stitching running stitch too. It’s up to you.
How to work with DMC metallic thread: some tips …
Use shorter lengths of thread than you would with DMC stranded cotton. Try with eg 25cm lengths of metallic.
If only using a few strands at a time (e.g. 3 of the 6 strands), you’ll need to think of a way to keep the unused strands usable. One way is to separate the strands for the length you require, and just cut those strands from the skein. The other s to get 2 needles. Cut your length. Separate strands a little. Thread the strands you want to use n a needle. Thread the strands you don’t want on a needle – to stop them going awol.
The DMC metallics are great for some stitches, but not all: for instance, perfect for couching, but tricky (impossible?) for French knots. Techniques that minimise actually pulling the metallic thread through the fabric.
Work carefully, observing your stitches. You may need to carefully tweak the threads to ensure they have all pulled through evenly.
Take extra care to ensure you thread is secure when starting to sew and when finishing a thread too; the metallic threads have a mind of their own!
Tips on solving embroidery ‘mistakes’
Here are a few thoughts and solutions to try and help you make the stitches the way you want them to be.
Do you really need to unpick your embroidery?
Sometimes you might look at your stitching and just feel as though – AGGH! IT’S GOT TO BE UNPICKED! … but has it?
When feeling as though you’ve got to unpick it, we recommend: Stop, take a breath and think about your options.
For just a small number of stitches that you have just sewn, then go for it and unpick them. You may even be able to whisk your thread back, rethread your needle and carry on calmly. If the thread looks a bit threadbare / hassled, then discard and restart sewing with a fresh thread.
If it’s a more substantial area, or some stitches that you worked on a while back, this is where you need to think before you reach for the scissors.
Maybe start stitching a different part of your embroidery design, while you reflect on whether unpicking your embroidery is the best idea.
If it a minor error, perhaps you can salvage it – embellishing the area with additional stitching over the top. BUT – this can make the problem look worse and be more noticeable – so proceed cautiously.
If you can live with the minor error, then carry on stitching your embroidery. Once you’ve completed the work in entirety you can assess the big picture of places you might need to work on further.
How to unpick your embroidery
Before you unpick – have you read ‘Do you really need to unpick your embroidery?’ above?
If you really do want to unpick your stitches, use sharp pointed scissors to carefully cut the offending stitches. Be careful not to cut the fabric. A pair of ordinary tweezers is useful for pulling out the cut threads. Don’t be tempted to try to unpick the thread carefully (for more than just a few unpicked stitches) and reuse it. The thread will likely look a little worn and/or have lost its lustre. By cutting the offending threads and using tweezers you will be able to remove this ‘baddies’ whilst causing the least damage to the fabric. When you start sewing, use a new thread.
Tips to help you place your stitches correctly
This section would more appropriately be called ‘How to place your stitches the way you wish’. The notion of ‘correctness’ can be a killer to creative fun can’t it. But it’s important to each of us to be able to place our stitches, as far as possible in the place we wish them to be. Here are some tips to help you do this.
1. Before you pull you needle or thread entirely thread, take a peek with your needle, and see that you have placed it in the place you wish, and your stitch is going to end up the size and in the direction that you wish. This sounds obvious, but taking that time to slow down and check – being mindful about each stitch can be really helpful – and is a super calm way to work.
2. If doing longer stitches – such as Satin, Liad work or Trellis, for instance – take a moment to ensure your thread has no twists, and lie it across the fabric, tension it, and then insert your needle, and it can help your stitches form more precisely and neatly if you wish.
Tips to smooth over embroidery glitches
GAPS IN YOUR STITCHES: when sewing filling stitches, such as Satin, Laid work or Long and short you may notice a few gaps in your stitching as you go. It’s often easy to go back and add to an area – just using 1 thread for instance – to fill in these gaps. So don’t worry about them for the moment. They are an easier problem to solve than areas that have become perhaps too congested with stitches.
DODGY STITCHES: sometimes stitches don’t go to plan. You could embellish with additional decorative stitching over the top – such as Trellis, Chain or Couching, for instance – or even use some sequins if you have some. Sometimes unpicking may be the solution (see above for tips how to do this).
EDGING STITCHES: adding an outline to an area of stitching can really lift it, covering over uneven edges and fine-tuning the look.
Lastly, we can tend to be a bit harsh on the things we create. Remember you’re a human being – and that’s a fabulous thing to be – and the process is as important as the product, maybe more so, so enjoy! A little human error, an idiosyncratic way of sewing, the sleight of hand, or lack of it, can actually be the charm.
Practice tip!
You may like to practice on a spare bit of fabric before trying it out on your embroidery. Experiment with the number of strands of thread and the size you create the stitches etc. Ponder how you’d like the colours to be placed. Practice getting your stitch tension as you’d like. A little practice will bring you all the more enjoyment when you sew your kit.
EXPLORE WORKED EXAMPLES: see the tips and notes giving just one set of ideas as to how the Moon kit and the Sun kit may be worked.
