Below are notes about embroidering the Sun cushion / wallart. These are just one person’s way of stitching it – a ‘for instance’ of how it may be sewn, and obviously there are numerous other possibilities too!
How you stitch your work is entirely up to you. In your kit notes booklet you’ll find a selection of suggested stitches.
For closer guidance, tips and hints to follow, or perhaps just a few insights and inspiration to get you going, see the further notes and photos below.
Sewing the Sun – notes

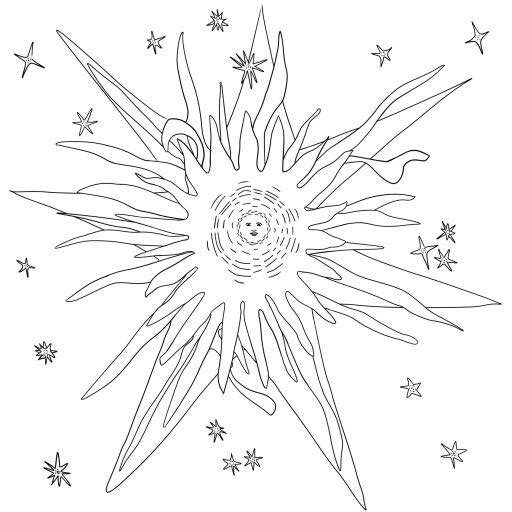
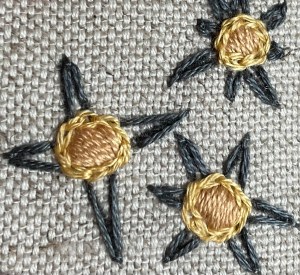
WHERE TO START? – AN OVERVIEW: I outlined all the rays with Stem stitch (using 3 threads). Then I gradually worked to fill all the areas with embroidery, doing the face and face rays first, before moving to the outer rays, and finishing off with the tiny stars, then border.
Below I have given the outlining details followed by the filling details, for each ‘area’ of the design. In reality, I did all the outlines first, then filled in, as I said.
THE OUTLINES: Very often in embroidery it is recommended to stitch outlines last for a neater end result. I preferred to do many of the outlines first to encourage
me with a sense of progress!
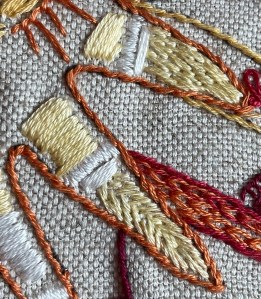
FILLING THE INNER RAYS: First the inner rays were worked from the tip in
yellow (2 threads). Then Satin stitch added in yellow (6 threads). Any gaps filled
with Satin stitch in white (2 threads). And small stitches in white (2 threads).
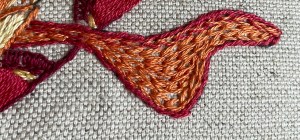
FILLING IN THE NEXT ‘ROW’ OF RAYS: I filled the ‘unruly’ rays with Chain stitch in orange (2 thread). For the other rays, I used Fly stitch in yellow (2 threads).
Then added individual chain stitches to fill in the gaps, in orange, red or burgundy (2 threads).
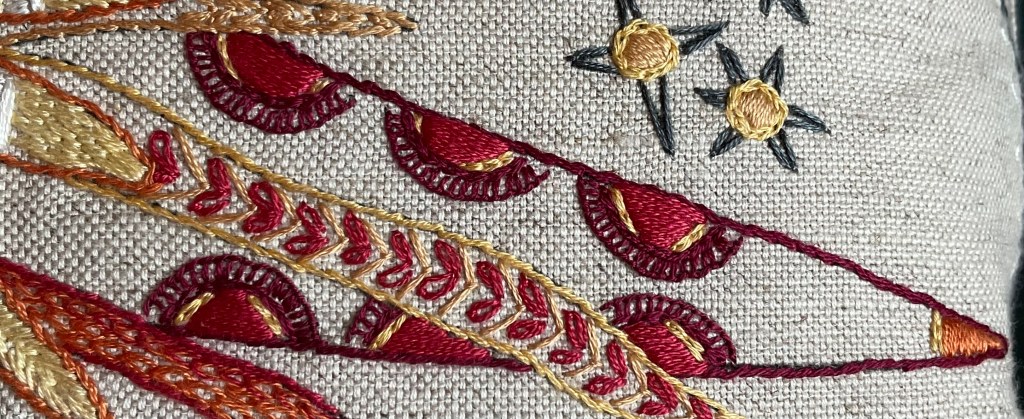
FILLING IN THE OUTER RAYS: First I Blanket stitched semi-circles in burgundy (2
threads). (I used a 1p coin using a pencil to help me sew neat semi-circles). Then I
filled the semi-circles with Satin stitch in red (6 threads). Filled any gaps with chain
stitch in yellow (2 threads).
NOTE: As it was an all-over picture with a central point, I decided to divide up
some (but not all) of my lengths of stranded cotton and apply them in a manner
to distribute the colours fairly evenly across the design. This decision also allowed
me to use the supply of threads in the kit to the maximum effect.
To divide the thread I cut it into usable lengths (very approximately 18 inches /
45cm long). I then allocated these lengths accordingly. For instance: I knew I
wanted to use the two yellows to fill the central area, so divided some of my yellow
lengths into 20 piles (for the 20 inner rays). Each ray has a very similar amount of
thread used on it, even though the rays are different sizes. This gave an orderliness
I liked.
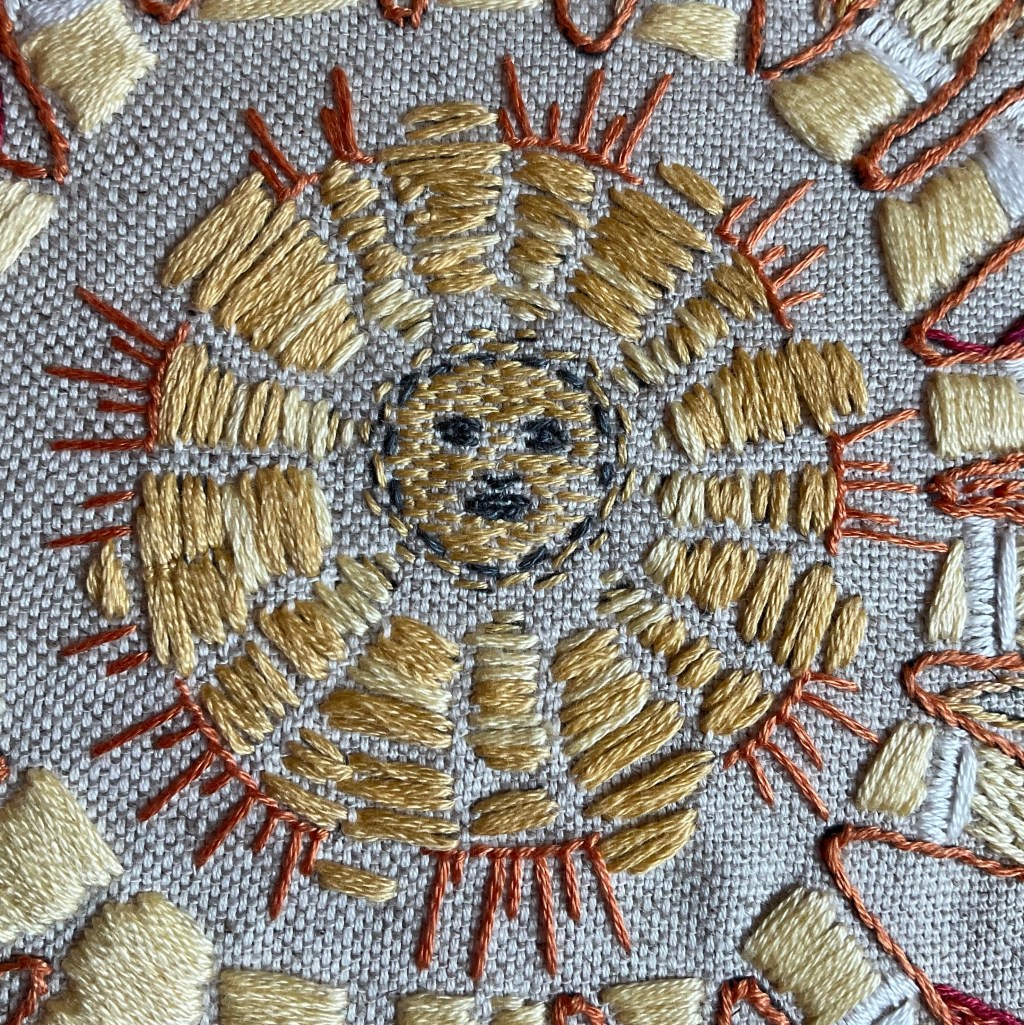
(DMC) in parallel rows of running stitch, offset. The starter long and short stitch
instructions in your booklet would be helpful, or just see the photo here. (Strictly
speaking the way I ended up sewing the Sun’s face is sewn is brick stitch, but it was
intended to be very regulated long and short!). Next I edged it in dark yellow
running stitch. The features of the face, grey (1 thread). Grey (1 thread) around the
edge. For the face rays, I stitched Half Satin stitch (6 threads). This can be known
as laid work – see note in your booklet on the Satin stitch pages.
TIP! Once you have stitched an area with Satin stitch, edge it – for instance with chain stitch. This will tidy up the edge of the Satin stitches if needed!
THE BORDER: I just had a bit of thread left over so decided to add a border. If you do this remember to divide your remaining thread by 4 so that you have enough to treat each side the same.
NOTE: We hope you find these notes and photo details helpful. We really encourage you do stitch the Sun kit in the way that you wish, taking ideas and inspiration from the above as much or little as you prefer.
You may find that as you work on the kit you find you’re more keen to go your own way – and this is great. In can even be more relaxing to do it your own way, as you’re not having to check back with anything, and can immerse yourself in your materials in front of you.
We wish you much enjoyable stitching. And would love to see your progress and completed pieces! Please email us at Yellingtreepress@gmail.com
EXPLORE WORKED EXAMPLES: see the tips and notes giving just one set of ideas as to how the Moon kit may be worked.
