Below are notes about embroidering the Moon cushion / wallart.
They are just one version of one person’s ideas. Pick and choose any of the
ideas you may like to do too.
Whether you just wish to use the photos, notes and tips below for inspiration, go your way, or copy it closely – any of these options are entirely fine!
Sewing the Moon – notes
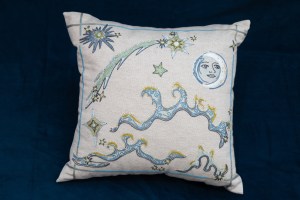
WHERE TO START – AN OVERVIEW:
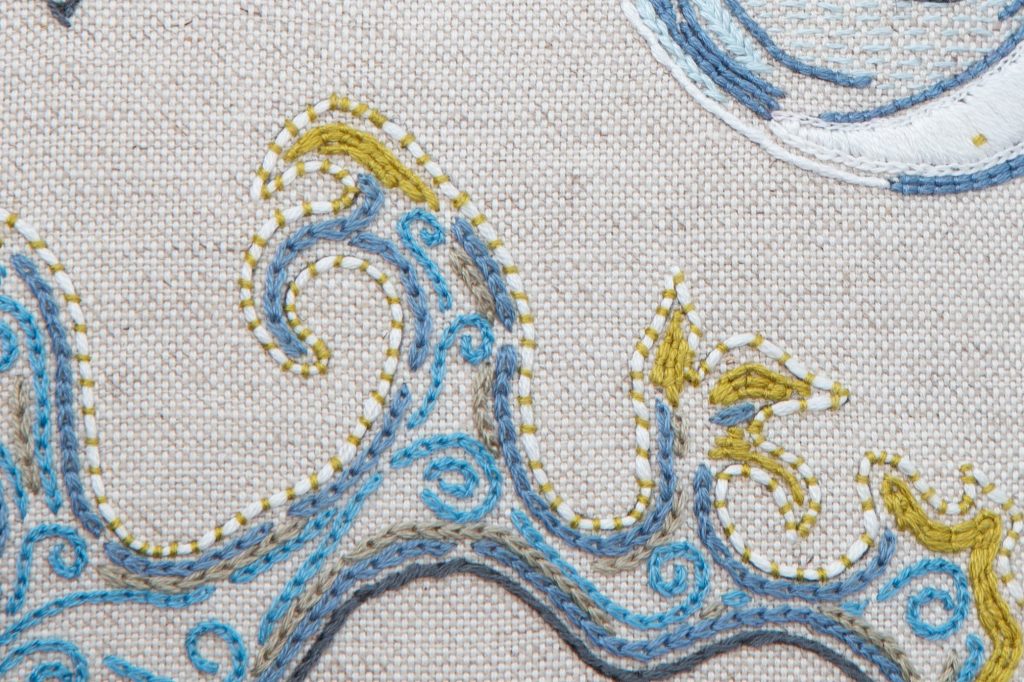
First I stitched all the small stars, then outlined the waves/clouds, then
outlined the other things, usually in Stem stitch, before moving on to filling the shapes.
I used the grey to provide cohesion to the design – using it for outlines across the piece.
THE OUTLINES:
Very often in embroidery it is recommended to stitch outlines last for a neater end result. I prefered to do many of the outlines first to encourage me with a sense of
progress, getting the areas filled in!
THE SMALL STARS:
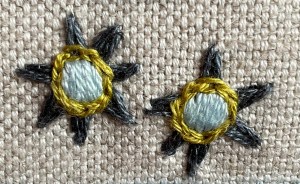
Chain stitch in yellow-green (2 threads) around the centres.
stitch them in Chain if you like).
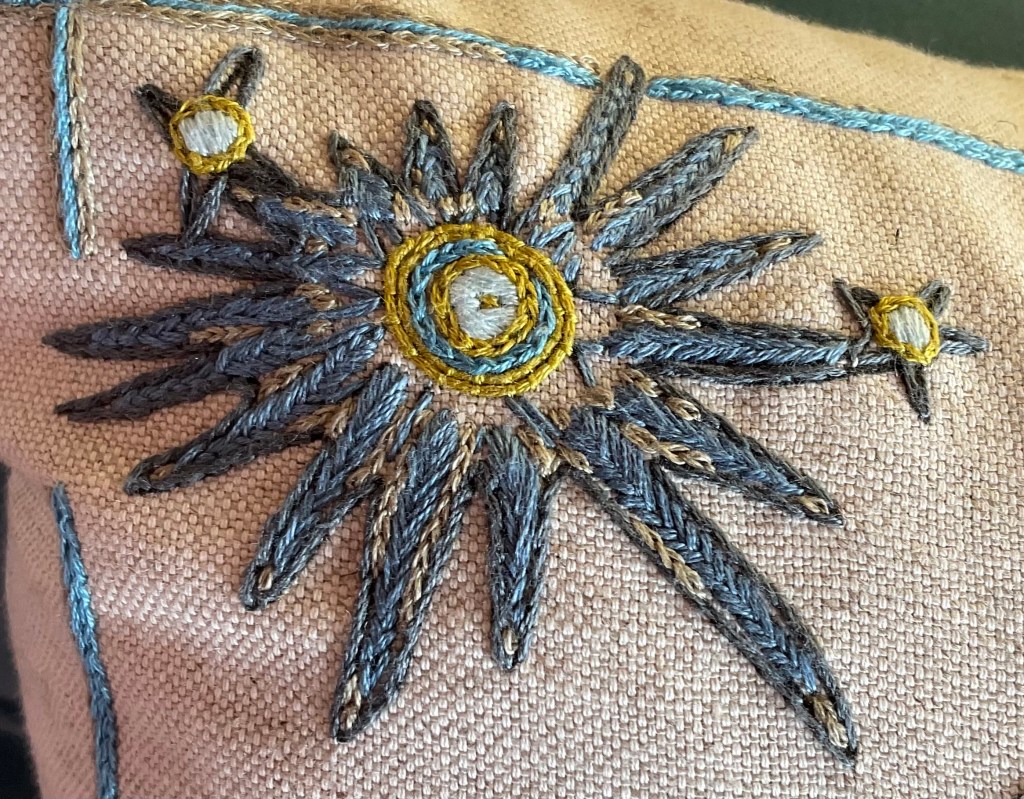
Fishbone stitch in dark blue (3 threads). Centre pale blue to echo the mini stars, edged in
Chain stitch and then Couching.
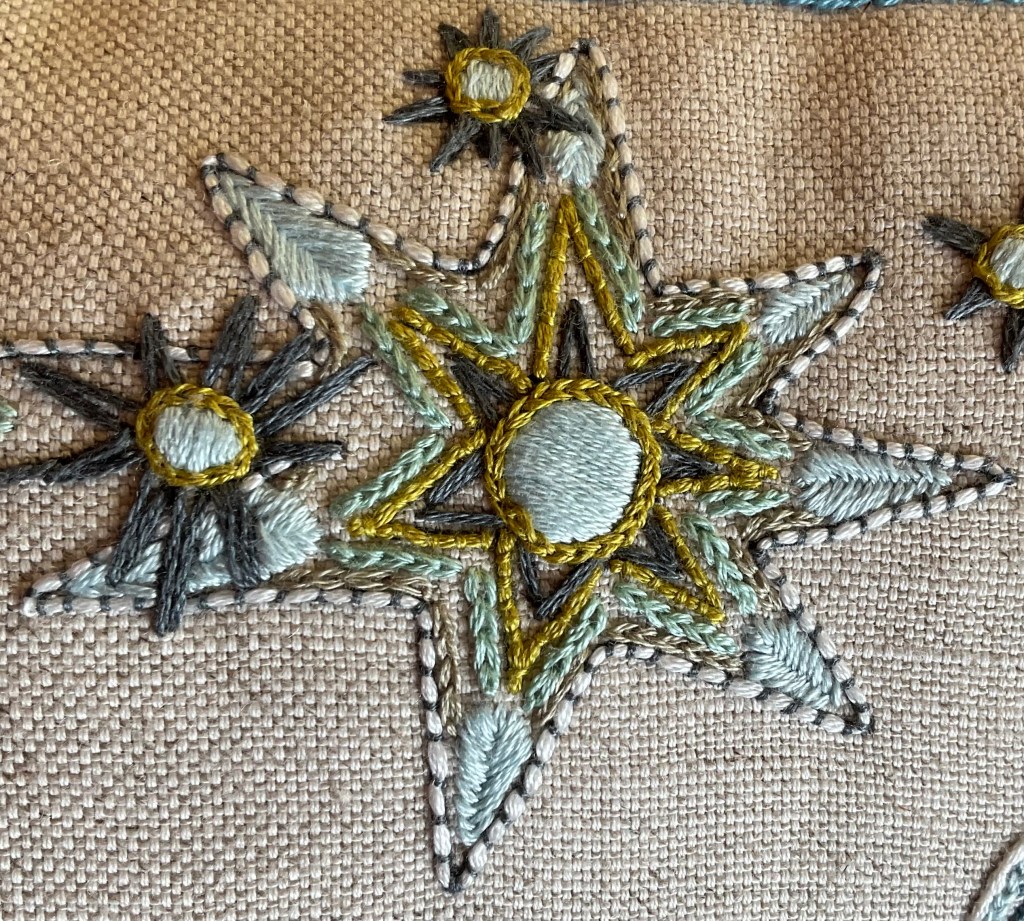
threads); Fly stitch in dark grey (3 threads); Couching in yellow-green as for crests of wave/
clouds for unity; Chain in pale green (3 threads). Star points – Fishbone stitch in pale blue (2
threads). Outline – Couching in white (6 threads) couched down in dark grey (2 threads).
Chain stitch in beige (2 threads) to fill gaps.

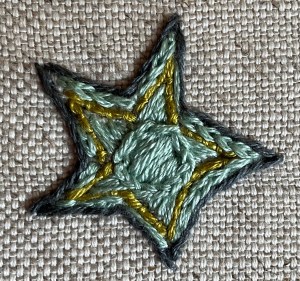
in dark grey (3 threads). Embellished with Couching in yellow-green (6 threads base,
couched with 2 threads).

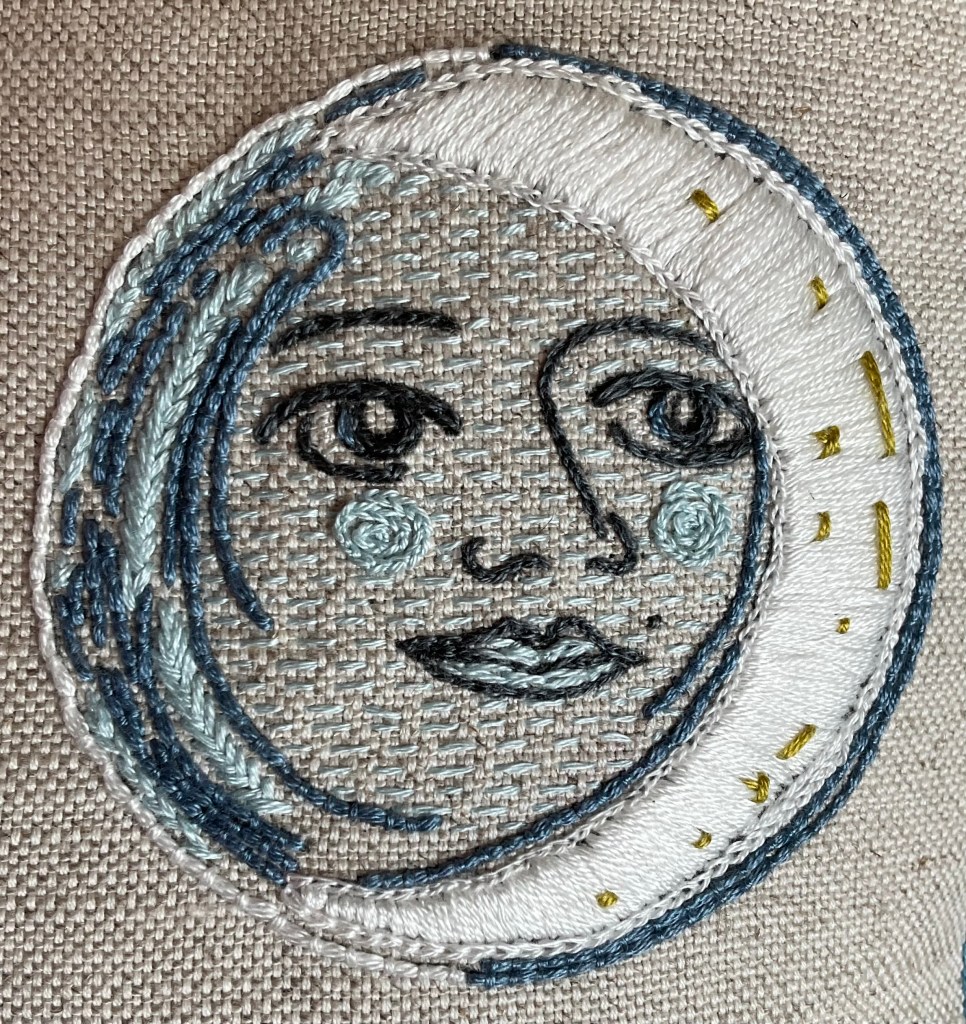
thread was also used for the pale blue ‘rosy’ checks in Chain stitch and for the pale blue
horizontal parallel rows of filler stitches. The crescent of the Moon was Satin stitched (6
threads white) and outlined in white Chain stitch; the craters on the crescent were added
afterwards, using the illustration in the notes booklet to guide placement. The left-hand side
of the Moon was worked in Couching in dark blue (6 threads couched down with 2 threads)
and Fishbone stitch in pale blue.
THE BORDER: I just had a bit of thread left over so decided to add a border. If you do this remember to divide your remaining thread by 4 so that you have enough to treat each side the same. Chain stitch in bright blue and sand (2 or 3 threads).
A REALLY IMPORTANT NOTE! These notes don’t represent the ‘right’ way of sewing the design – they are just ‘a’ way.
Remember the ‘rules’ – there are no rules to beat yourself up
with. There are tips and traditions to be treasured, shared and used, or not, as we find to be best. Have fun!
And do share us photos of your work – we’d love to see them! (Email yellingtreepress@gmail.com).
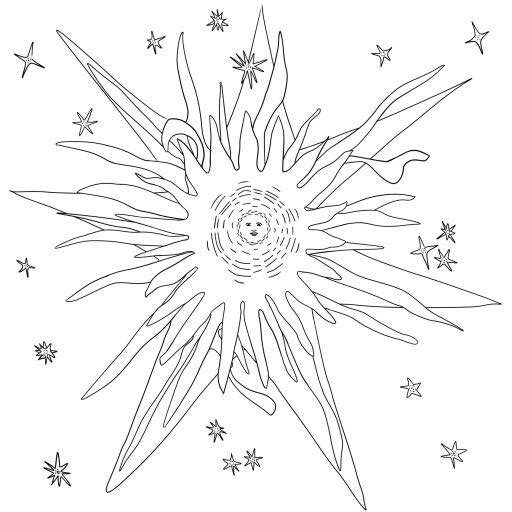
EXPLORE WORKED EXAMPLES: see the tips and notes giving just one set of ideas as to how the Sun kit may be worked.
